
Account settings
Open Settings from the gear icon on the left or the account menu. Each section below is a row you can expand, click its title to open it.
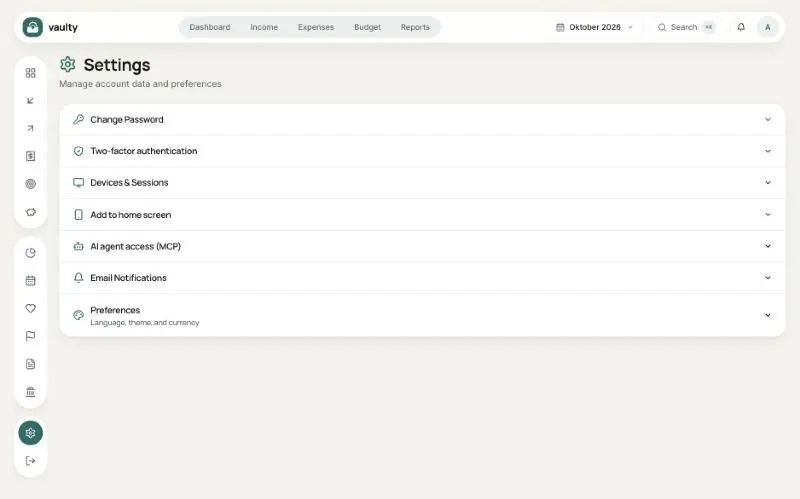
Change password
Section titled “Change password”Enter your current password, then the new one twice (at least 12 characters with an uppercase letter, a lowercase letter, and a number). Other devices are signed out automatically, this device stays signed in.
Two-step verification (Personal and above)
Section titled “Two-step verification (Personal and above)”Click Enable 2FA, scan the QR code with an authenticator app (the account is named “Vaulty”), enter the 6-digit code, and keep the recovery codes somewhere safe. From then on every sign-in needs a code from the app.
Devices and sessions
Section titled “Devices and sessions”The list of devices currently signed in. Click the sign-out icon next to a device you do not recognize to remove it.
Install as an app
Section titled “Install as an app”The Install app card helps you add Vaulty to your phone’s home screen or your computer. On iPhone, follow the manual instructions shown.
AI agent access (MCP)
Section titled “AI agent access (MCP)”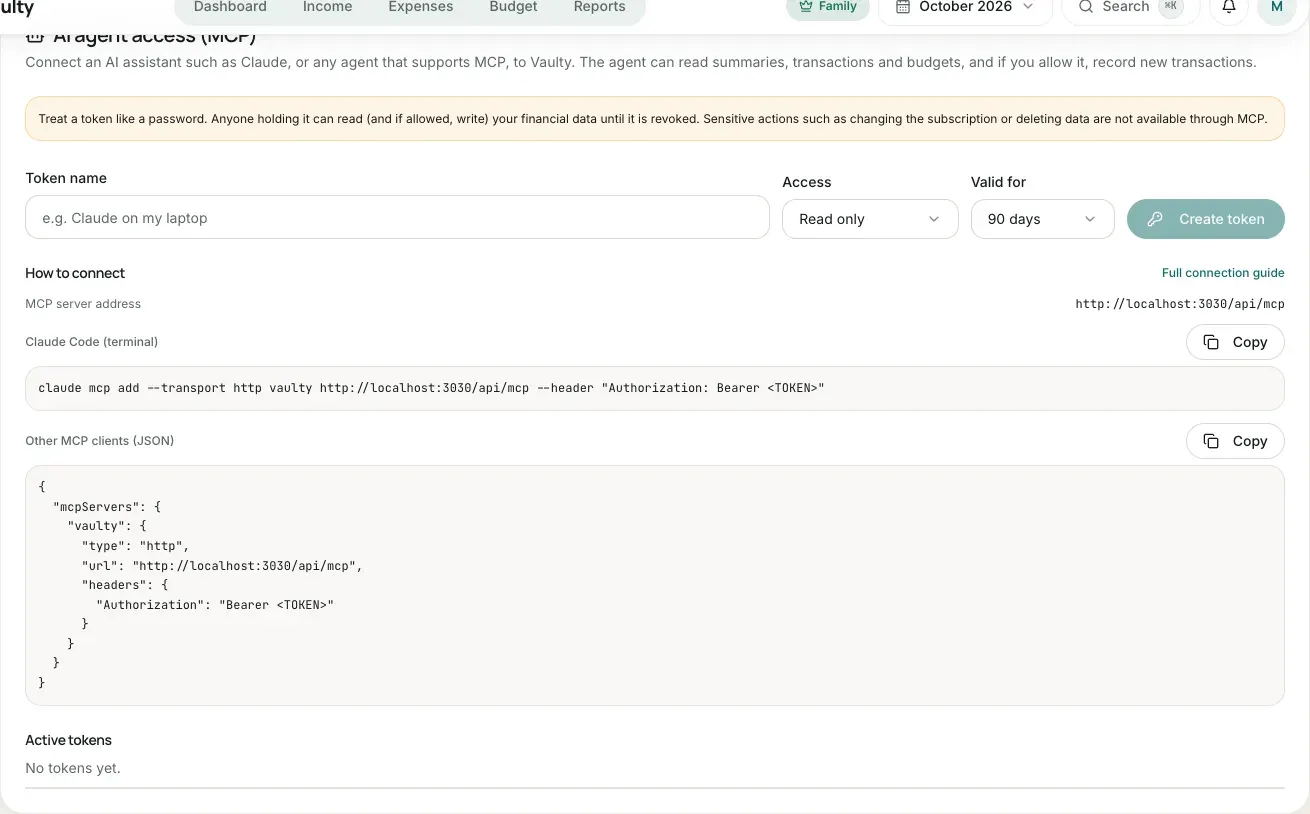
Create a token to connect an AI assistant. The full guide is in Connecting an AI agent.
Email notifications (Personal and above)
Section titled “Email notifications (Personal and above)”Set a destination address, then turn on Send email for bill due dates, budgets nearly used up, and debt installments (how many days ahead and the budget threshold can be set here too).
Turn on Email on every transaction to get an email each time you record an income or expense. Off by default. Fill in Minimum amount if you only want to hear about transactions above a certain amount, leave it empty for every amount.
The Send Test Email button confirms your SMTP setup works, and Check Now refreshes the list of alerts already sent.
Language, appearance, and currency
Section titled “Language, appearance, and currency”- Language: Bahasa Indonesia or English. Every screen, email, report, and invoice follows this choice.
- Appearance: light or dark mode.
- Display currency (Personal and above): numbers are converted for display only, your stored data does not change.
- Recording currency: the actual currency your transactions are stored in, chosen the first time during onboarding. Only the organization owner can change it here. Changing it automatically converts all existing data (income, expenses, budgets, bills, savings, debts) at that day’s exchange rate, so the real value stays the same even though the numbers change. If exchange rates cannot be fetched, the change is rejected until it can be retried.